

Since 1st July 1906, West of England expresses from Paddington had been routed through Castle Cary, on the Weymouth line. This had been made possible by the opening of a branch from Castle Cary to Charlton Mackrell, Somerton, Somerset, in 1905. Subsequently, in 1906, the line was further extended from Charlton Mackrell to Langport, where the B&ER’s Taunton to Yeovil branch was met. The more direct route to the south west reduced the GWR’s Paddington to Exeter distance from 193½-miles to 173¾-miles. This put the company on a level playing field with the LSWR, which boasted a Waterloo to Exeter mileage of 172. Onwards to Plymouth, the GWR had the advantage, with a mileage from Paddington of 225¾; the LSWR’s North Devon route via Okehampton, to Plymouth Friary, totalled 234 miles from Waterloo.
To compound reduced journey times of Paddington services, the LSWR had to endure the annoyance of Exeter St David’s station en-route. GWR policy decreed that all ‘’foreign’’ services had to stop there, which meant that even the fastest Waterloo expresses had to make two station calls within 1100-yards of each other. To avoid this, the LSWR put forward the ‘’Exeter Deviation’’ in 1905, a 2½-mile-long double-track line bypassing GWR metals. Surveyed by LSWR engineers W. R. Galbraith and J. W. Jacomb-Hood, it was proposed that the avoiding spur would emanate from Queen Street station and pass over the GWR main line south of St David’s, upon a viaduct. Thence, it would run roughly parallel with the Paddington route, until joining the Exeter & Crediton line just north of the existing junction at Cowley Bridge. The GWR poured cold water on the LSWR’s plans during a court hearing, which ruled in favour of the former. LSWR services, which were signalled into the central island platform at St David’s, thus continued to cross the GWR main lines on the level. All was not lost, however, for a St David’s bypass, and after the Grouping another opportunity arose to pursue the same scheme laid out by the LSWR. This time the company’s successor, the Southern Railway, got beyond any GWR opposition, and preparatory works for the spur began in 1935. This involved re-aligning the River Exe on a new course, to provide additional land west of St David’s for the avoiding line. Whilst that task was indeed completed, the outbreak of World War II saw work come to a halt and, ultimately, killed the scheme stone dead.
In the meantime, alterations to the ‘’down’’ side structure at St David’s station had been approved. The works took place over the period 1938 to 1940, and chiefly involved building an upper floor of stone-faced offices along the station’s eastern façade. The offices stretched for 205-feet in front of the B&ER retaining wall of 1864, and were 30-feet in width. A new canopy was attached to the eastern façade: this was a plain design of riveted steel construction, and in total extended to 360-feet. The canopy was formed of two distinct sections of 180-feet length each, one of which was set further back into the building. At the same time, a new enlarged booking hall was brought into use, but the huge ornamental urns upon the eastern wall were removed. In the apex of the converging Bonhay Road and St David’s Hill, on the opposite side of the forecourt to the station entrance, staff accommodation was built. This comprised an attractive two-storey-high red brick structure which, although erected by the GWR, was actually built to an existing B&ER design dating back as far as 1861. The original structure of this design was erected by the B&ER on the main ‘’down’’ platform of the 1864-rebuilt station, and was used as offices by that company. Happily, this building survived the alterations which took place during 1912 to 1915 and 1938 to 1940, and is still with us today.
World War II caused a boom in railway freight traffic, much of that in the West Country being handled at Hackney Marshalling Yard, Newton Abbot. To complement these sidings, an additional freight yard was brought into use at Exeter, on the ‘’up’’ side of the main line north of St David’s station and Red Cow Crossing. Dubbed ‘’Riverside Yard’’, it was opened during 1943, being controlled from a dedicated signal box. The latter, called ‘’Exeter Riverside Box’’, formally came into use on 2nd July of that year: it was an all-timber two-storey-high structure, identical to that then in use at nearby Exminster. Built to a standard GWR design with a slated pitched roof, the 53-lever cabin was in fact second-hand, having been made redundant at Hatherley Junction, Cheltenham. In the meantime, nearby ‘’Exeter East Box’’ had been bombed out by the Luftwaffe in 1942. A replacement signal cabin of the same name was brought into use on 17th June of that year, which controlled those ‘’down’’ goods sidings north of the level crossing. In addition, it had duplicate control on some parts of Riverside Yard, which required the cabin to be electrically interlocked with Exeter Riverside Box. As if the signalling alterations described thus far were not complicated enough, the cabin at nearby Cowley Bridge Junction was also extended by a third of its original length in May 1943. This was done to accommodate a 44-lever frame, enabling the signal box to control a series of additional freight sidings. The latter were laid on the ‘’up’’ side, upon a thin strip of land between the junction and the main Riverside Yard.
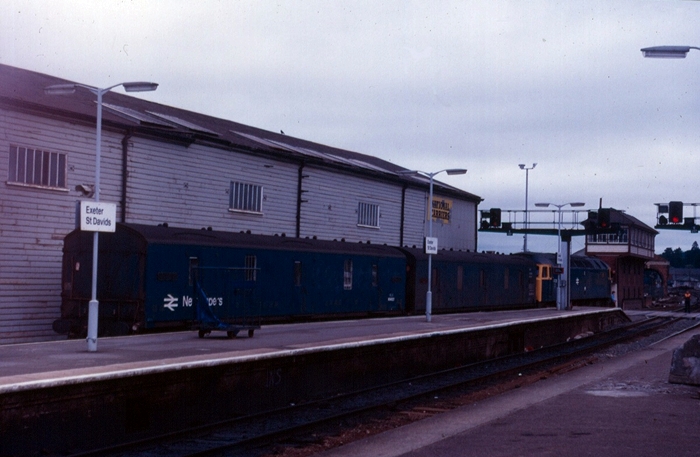
Class 47 No. 47294 stands at the head of a newspaper train, alongside that section of the timber goods yard which was flattened in 2002. The semaphore signals had gone, but Exeter Middle Box remained standing - just. © David Glasspool Collection
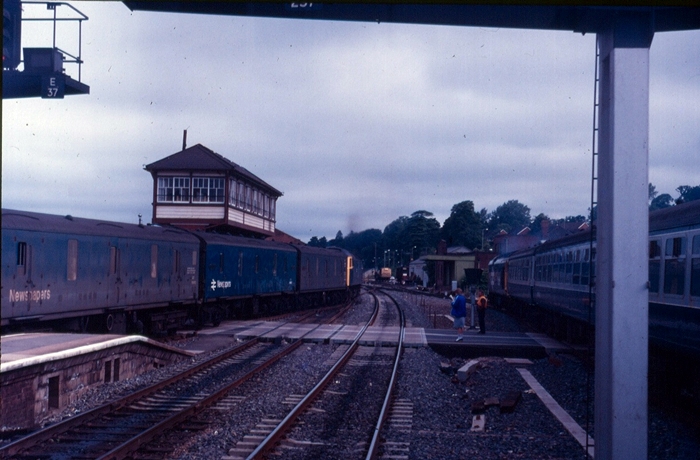
On the left, we again see Class 47 No. 47294 departing with a newspaper train, this time one vehicle longer. On the right can be seen Class 50 No. 50031 at the head of a rake of BR Mk 2a carriages. The level crossing was renewed as part of the re-signalling scheme. © David Glasspool Collection

InterCity 125 power car No. 43027 is seen at the rear of the Penzance to Edinburgh cross country service, in this view depicting the southern end of the station. The track foot crossing in the foreground remains in use for staff and is controlled by a series of lights: when these are illuminated, it is safe to cross. © David Glasspool Collection
Return to the Kent Rail Homepage or alternatively, check for Updates.
Website & Copyright information - Links - Contact the Webmaster